Instructions - HTML5 Video Player (Video.js)
In order to display HTML5 video and ensure browser compatibliity, we need to upload two versions of our video - an .mp4 file, and a .webm file. You can convert any video to these file formats using the free website: http://www.online-convert.com
STEP 1 - LOAD THE WIDGET
- Download the HTML5 Video Player widget to your computer (.zip). Extract the contents to a folder on your computer.
- Double click the “.mulib” file - this will add the widget to Adobe Muse.
- Once the widget is loaded into Muse, drag and drop it out onto the canvas.

 STEP 2 - FILL IN THE OPTIONS PANEL IN MUSE
Click on the widget options flyout (blue arrow), and edit the options as follows:- Video Name – create unique names for videos if you intend on using multiple instances of this widget on a single page.
- Preview Image URL – a link to the preview image (or thumbnail) that you want to show before the movie plays. If you upload a graphic using Muse (File > Add to Upload) you will need to add "assets/videoname.jpg" in the widget options.
(e.g. assets/preview.png) - Video File (.mp4) – a link to your .mp4 video file. Add "assets/" prior to the video name if you upload the videos directly in Muse.
- Video File (.webm) – a link to your .webm video file. Add "assets/" prior to the video name if you upload the videos directly in Muse.
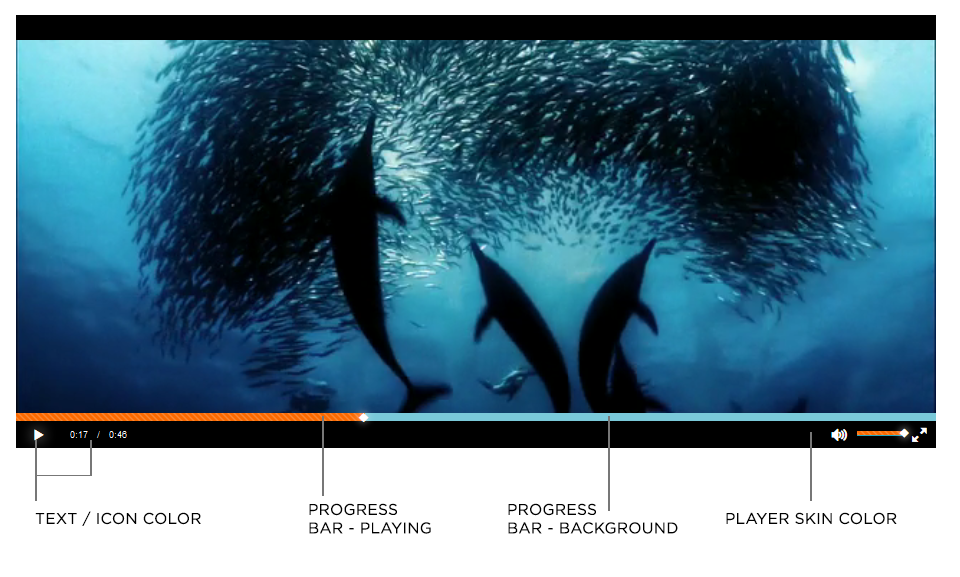
- Player Skin Color – A hex color value to change the player skin color. This will also control the play button background.
- Text / Icon Color– A hex color value to change the font colors and small icons (play, pause, etc.)
- Control Text Size – a percentage value controlling the size of video text (time indicators, etc.). Maximum 200%.
- Progress Bar - Background – A hex color value controlling the progress bar background color.
- Progress Bar - Playing – A hex color value controlling the progress bar "overlay" color. This will also control the color of the volume dial.
Once you've linked your videos in Muse, simply drag the frame dimensions to any size you wish. This widget does not support full width videos, use our full width video widget to accomplish that.
STEP 4 - PUBLISH THE SITE
Click publish in Muse. Uploads for videos othen take longer, due to the increased file size. You can also preview the site in your browser (File > Preview in Browser) for an accurate representation of the site.
For more help using this widget, visit our support portal